


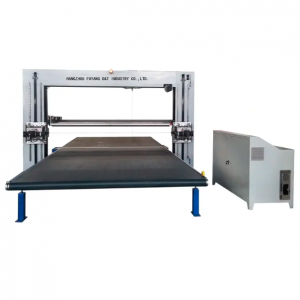
With its versatility and precision cutting ability, the dual blade oscillating cutter has become an invaluable tool in the world of woodworking and DIY projects. However, in order to get the most out of this tool, it is crucial to know how to change blades efficiently. In this blog post, we will guide you step-by-step on how to change the blades of a dual-blade oscillating knife, ensuring a seamless transition and uninterrupted workflow.
Step 1: Prepare to replace blades
Before starting the process, ensuring your safety is of the utmost importance. Always remember to disconnect the tool from any power source before attempting to replace the blade. Also, wear goggles and work gloves to protect your eyes and hands during this process. When you're ready, gather the necessary tools - a hex key or Allen key (depending on the knife model), a new blade, and a clean cloth.
Step 2: Remove the old blade
For dual-blade oscillating cutters, the blade changing process usually involves a tool-less quick-release mechanism, which makes changing the process convenient and simple. Locate the knife holder, usually in front of the knife head. Depending on the model, you may find a locking lever or blade release button nearby. Engage the locking lever or press the release button to unlock and release the blade.
Step 3: Clean and inspect tools
Now that the old blade has been removed, please take a moment to inspect the tool. Carefully wipe down the knife block and surrounding area with a clean cloth to remove any dirt, splinters or sawdust that may have accumulated. Make sure the stand has no loose parts or damage before proceeding.
Step 4: Install the new blade
Take your new dual-blade oscillating cutter and line up the mounting holes on the blades with the corresponding pins or studs on the blade holder. Remember that most blades are designed with arrows to indicate the correct direction of insertion to ensure the best cutting results. Slide the blade onto the bracket and push firmly until it locks into place. Pull it gently to make sure it's securely attached.
Step Five: Test the blade
Once the new blade is securely installed, you're almost ready to get back to work. However, before starting a project, it is critical to test the seal and performance of the blade. Grip the blade firmly and try it out gently to make sure it doesn't wobble or feel loose. If everything feels stable, then you're good to go!
Step 6: Maintenance and blade care tips
To prolong the life of your dual blade oscillating cutter and maintain peak performance, it is essential to clean the tool after each use. Remove any remaining dust or debris with a cloth or compressed air. Inspect the blades regularly for signs of wear or damage and replace as necessary. Keep your tools and blades clean and well maintained for precise and efficient cuts every time.
in conclusion
Mastering the art of changing the blades of your dual blade oscillating cutter can bring you one step closer to excellence in woodworking and DIY projects. By following the steps above and practicing proper tool maintenance, you can ensure a seamless transition of your inserts and enjoy consistent cutting performance. Remember that safety is always your top priority, so don't rush and take all necessary precautions to protect yourself during blade changes. Let your dual blade oscillating cutter unleash its true potential and bring your projects to life!
Post time: Jul-05-2023